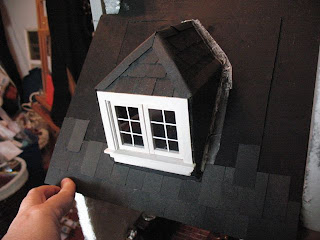
I have four hipped dormers to make for the William and Mary dolls' house, and I started with the one in the kitchen roof. I'll do a proper tutorial on hipped dormers when I do the three on the main house, but here's a walk through.
Here's my reference photo:
Based on this photo, I chose the Housework's working casement window. I painted the window white and added the panes using 1/32" vinyl model striping. Then I built my dormer from foam core, because it's light and easy to adjust. I glued and then duct taped the dormer together.
I drew the outline of the dormer unit on the backing, and cut out the opening.
I glued the dormer to the backing panel over the hole, and used narrow strips of aluminium tape (used for duct work) to mimic lead. I slated the dormer with Richard Stacey Versi Slates, using folded slates as ridge tiles. Then I started slating the roof, making sure that the backing panel for the dormer would lift free of the roof base, so I have access to the little room underneath.
I've run out of slates, so have to wait for my shipment, but I'm very pleased with this first attempt!


.JPG)


This looks great. Thanks for sharing.
ReplyDeleteHugs,
Dorien.
You are so BRAVE to do Dormers, Especially Hipped-Roof ones! That's a LOT of angles to play with! Your slates look great... and the aluminum flashing too! The results will be SO worth the effort!
ReplyDeleteIt looks really good Nina!!!!!
ReplyDeleteThanks so much, Dorien!
ReplyDeleteI didn't realize how complicated hipped dormers would be, Daydreamer, before I launched into them :) But I really like the way they look, so I hope it'll be worth it!
I appreciate your comment, Elga!
These look excellent Nina. You've made a very good job of them. Hurrah for foamboard!
ReplyDeleteBTW - did you get my message?