Friday, November 30, 2012

Camp Mini Ha Ha featured on CBC radio

During Camp Mini Ha Ha this year, Jackie Torrens shared two days of our work and celebrations, and her piece on miniatures and miniaturists is being broadcast on CBC tomorrow.  

But you can hear it via the CBC website any time you like :)

Every Fall, for more than 10 years miniaturists from Canada, the US and the UK have gathered in Annapolis Royal, Nova Scotia.
They spend 5 days building miniature replicas of real-life objects.... at a place they call Camp Mini Ha Ha.
It's the brainchild of three people, Debbie Parrot and Sheryl Hartland from Nova Scotia - and Marcy Cumberland from the US.
About 30 campers go every year, and while men are welcome, so far most of them have been women.
Writer, actor and regular CBC contributor Jackie Torrens, has a thing for people whose interests are off the beaten path.
We sent her to Mini Camp for two days....and there she found that big revelations can be had, even in a world so small....

I think it's a great piece -- Jackie was an amazing explorer of our mini world got us all discussing and talking about things. 

Camp Mini Ha Ha is an annual camp for miniaturists in Nova Scotia, Canada.


Monday, October 29, 2012

Lavender tutorial over at Miniature Enthusiasts of the South Shore!


We had a lavender-making spree today at the October meeting of the Miniature Enthusiasts of the South Shore!  In the course of it, I realized that once this window box for the Camp Mini Ha Ha cottage project was full of lavender ....


... that I should plant the front of the cottage with lavender, too!  And have lavender drying in bunches from the beam above the fireplace!  And call it ...

Lavender Cottage!

We had a lot of fun, and if you'd like to see my rough tutorial for making 1:12 scale lavender, you can check out the MESS Blog!

Sunday, October 28, 2012

Getting ready to raise the roof on the WAHM

Last night I finished applying bricks to the main chimneys.

A mixture of Richard Stacey's brick slips and bricks made from sandpaper.

Today I took the next step to finishing the WAMH, and got the roof ready to be attached.

I taped together the roof and then David and I measured angles and made the interior walls out of 1/2" builders' foam. I was originally just going to make a template out of the foam and cut the actual wall out of 3/8" plywood, but after seeing how nice the foam walls look, I decided to just go with the foam.


I used the template on the interior door package to cut the door openings in the foam.


I've painted everything now and, as soon as I've resized the stair opening, I will glue everything together!

Thursday, October 25, 2012

Knitwits working hard on their houses!

We had such a lovely Knitwits today!

This is Ruth's cottage. Last week she installed the shutters she had scratch-built -- I think they look marvellous.


She's chosen to model the fireplace after one in Port Royal.  Here's her reference photo:


 She got a lot of work done today choosing the palette of brick colours, cutting out bricks, base coating the high density foam that will become the chimney piece and so forth.


 Esther forged ahead with her Tudor merchant's house.  Here it is, definitely under construction!


The chimney breast is ready for her mantlepiece design, she finished building her basic stairs today and stained all the linings for the doors and windows. There's going to be a bookcase under the stairs, which will be partly enclosed in panelling, and there will be an inglenook next to the fireplace, with a bench perfect for curling up on and doing needlework.  Or so says Esther :)

The stairs are triangular lengths of balsa wood glued onto a backing of meranti board.  So easy to do, even for a young person!

And me?  I was pretty low energy when we started, but my young friends always make me feel better, no matter what mood I'm in :) I did a lot of work on my brick chimneys.  And, best of all, the WAMH is now in the living room -- it's getting too cold upstairs to work on it, and I really want to make a push this winter to get it done, so David kindly allowed me to bring it down and work on it here!  I packed everything up, we carried it downstairs and I've given it a good cleaning :)


The roof is just balanced on, but this is a HUGE house!

Monday, October 22, 2012

Glue bottle holder tutorial and second hip slated

At the Mini day out on Saturday I admired our instructor's glue bottle holder, and noticed that a number of women had various versions of the design.  Because I'm feeling sick and not up to much, but also bored and restless, I decided to make a version for myself!
Prototype glue bottle holder!


Materials list (for the wood I'm using actual measurements, not nominal). NB: these are just a guideline, of course, as I was grabbing scraps down in the workshop. I designed this for a 4 oz. (118 ml) round bottle -- if you travel with a 2 oz bottle and want a small portable holder, or want a holder for carpenter's glue in a square bottle with a thicker nozzle, adjust accordingly. 

BASE: 1 piece of pine: 75" x 2.5", 5" long  (2 cm x 6.5 cm x 12 cm long)
ANGLED SUPPORT: 1 piece of pine: 5/16" x 2.5" x 5.5" long) (1.25 cm x 6.5 cm x 14 cm long)

I cut one end of each piece at a 25º angle on the circular saw.  (If you don't want to bother with the angles or don't have the equipment you can make one with right angles, like this example from Cascade Miniatures

Showing the 25º angles a little better.
I marked out a curve on the non-angled end of the support (you can see from the photos that I did decide to angle the top end of the support later, for aesthetic reasons :)) This forms the niche in which the glue bottle will sit. I made this cut with a coping saw. I made it too shallow at first, which didn't hold the bottle as securely as I wanted.  I also found that it worked best if I coped the curve at a roughly 25º angle, too. 


I held the two pieces together and propped the glue bottle in place to mark where I wanted to drill my hole.  This hole will receive the tip of the bottle and keep the bottle in place.

I used a drill press and drilled a .5" hole -- it would have been better if it had been shallower (I was too lazy to adjust the press and drilled right through the base :)  I backed the hole with a scrap of wood and moved on with my life ...

Once everything was okay, I used wood glue and screws to attach the support to the base.  I should have drilled pilot holes, so my first screw split the wood, so don't do that :)  Nails would be fine, too. That's it!  It's practical, if not pretty, and I don't have to shake the darned glue bottle while I'm working.


I had received another order of slates from Richard Stacey, so I finished slating the second hip of my roof. I can now put it together if I'm feeling well enough tomorrow!


Sunday, October 21, 2012

Mini samplers almost done!


Here are the two 1:12 scale samplers I've been working on: the one of the right is done and the other is almost there!

The one of the left is Nancy Sturgeon's early 18th century Adam and Eve sampler from Annelle Ferguson's great book, Traditional needlework in miniature. The one of the right is from Pamela Warner's excellent Miniature embroidery for the Georgian dolls' house.

I want to get them done so I can block them and frame them, along with the Annelle Ferguson I stitched earlier this year.  It's sampler mania!

And I also want to get on to my next stitching project: the Lucy Iducovich Persian rug from Ferguson's book.

Saturday, October 20, 2012

Mini day out with the Miniature Crafters of Nova Scotia

Here's my start ...

Mary-Anne and I drove down from Lunenburg for this special mini making day in Halifax with the women of the Miniature Crafters of Nova Scotia, who usually meet once a month in Dartmouth. The project today was a wooden storage unit with baskets and it was a lot of fun!

As much as the project itself, what I enjoyed was the chance to learn tips and tricks from experienced miniaturists :)  It was also great to catch up with some of the campers from Mini Ha Ha and to meet some new folks!

And here's the finished unit!

Thursday, October 11, 2012

Knitwits back at work!

Ruth, Esther and I had a great day at Knitwits today.  We got right back to work on our mini projects after a long summer away from them.

I finished slating the back part of the WAMH's roof -- now I can put the thing together!  Woo hoo!

I also started the landscaping of the crofter's cottage -- I learned these techniques from Adrian at Camp Mini Ha Ha two weeks ago, and they work like a charm.  I laid out my areas of planting and path, and under painted where needed. I carved raised beds with slanting edges out of florist's foam and glued it in place.  I then underpainted the foam at the top where the plants will go, leaving the edges green for the grass. 

I mad a bit of path out of some natural slate Adrian gave us at camp, and filled in with tiny gravel and sand.  I applied glue to the florist's foam and added green railway flocking and dried tea leaves for grass and dirt, respectively.


Now I just have to make a lot of plants!


Ruth got a lot of work done on her cottage.  She stained her chairs with her homemade oak stain and got her shutters ready to install.  They all have their leather hinges on and have been carved and roughened up where needed.


Esther prepared and stained the frames to go around the interior door, and will install them and the door next week.  She also used the Minwax English Oak stain on her new Welsh dresser and made an oaken threshold for the kitchen door.


Next week should be very exciting!

Monday, October 8, 2012

Camp Mini Ha Ha crofter's cottage -- at home

Here are the photos I took this morning of the crofter's cottage project I completed at Camp Mini Ha Ha. There are a few things that need doing (I want to plant a tiny garden outside, the door needs some handles and I want to touch up a few things) but it's mostly done.


Friday, October 5, 2012

Miniaturist Kris Compass is making me another sofa!

Artisan Kris Compass has some lovely pieces of reasonably-priced upholstered 1:12 scale furniture for sale on her CDHM site:  see them here.


They include a beautiful Knole settee upholstered in red and gold, and I mention it because she's going to be making me one to go in the William and Mary House! I ordered it almost a year ago, and it's coming up to the time when it's going to be built for me!

Kris has a great blog where she generously shares many, many building tips and tutorials: 1 inch minis by Kris.  If you don't know it, it's pure gold!

Thanks for taking on my commission, Kris, and I can't wait to see how it turns out!


Wednesday, October 3, 2012

Final day of Camp Mini Ha Ha -- using LED lights

My last day at Camp was Sunday, as I decided to drive home to my man and cats at the end of the evening's events (most people stayed the night and left in the morning).
The overcast view from the main building over the Annapolis Basin of the Bay of Fundy.

Sunday was my wiring day.  I had worked on my light fixtures earlier in the week, but this was the day to wire everything together.

First of all, I tested each fixture, then I made the necessary holes in the structure with a bamboo skewer and started attaching fixtures: there are four lights on this model: coals, reflector sconce, candlestick and outside lantern.
The LED lights we used have built-in resistors and wiring, making them super easy to use
 We had a wiring kit supplied by Grandpa's Dollhouse, the Canadian distributor for the LED light sets made by Evan Designs.  The kit comes with five wired LED lights, already equipped with resistors, a 9 volt Battery Snap with pre-attached switch, two pieces of shrink tube for covering your connections -- Liz and Wayne of Grandpa's Dollhouse also supplied the 9 volt battery.

For the two fixtures that were placed high on the walls I needed to lengthen the wires to reach the base so I could attach them to the wires coming off the battery.  It's easy enough to do, provided you remember a couple of things:

Unlike 12 volt round wiring (the traditional stuff used in dolls houses) where it doesn't matter which wire you connect to which wire, LEDs have positive and negative wires, so one wires black to black and red to red.  You can extend the length of the wires coming from the bulb/resistor with ordinary white round wire, but you don't want to cross wires.  The easiest way to do this is to separate the length of round wire entirely, so you two lengths of single wire.  I connected one length to the red and one to the black coming from the LED and resistor, and then marked the one coming from the black wire with a bit of black paint at the end.

Ugly gouges on the side wall where I hid the wiring extension needed for my wall sconce.
You can make your connection a number of ways: after twisting the wires together, you can either solder them, shrink tube them or cover them (keeping the wires separate) in electrical tape. The latter is ugly, as you can see above, but I didn't have my soldering iron with me and I was running out of shrink tube!

All the wire gathering on the bottom of the model.  On the right, under the manky masking tape, is the 9 volt battery.
I hollowed out a place for the 9 volt battery on the bottom of the foam base.  With all the wires coming from the fixtures, I then simply connected all the black wires, covering the connection with a shrink tube and did the same for the red wires.  (Remember to slip that shrink tube onto the main wire first!)

Then, it was time to flick the switch!


That's my favourite moment of all in mini making -- the moment when the lights go on!

Having finished my model as far as it was going to go, I took a moment and snapped some shots of the other projects near me:

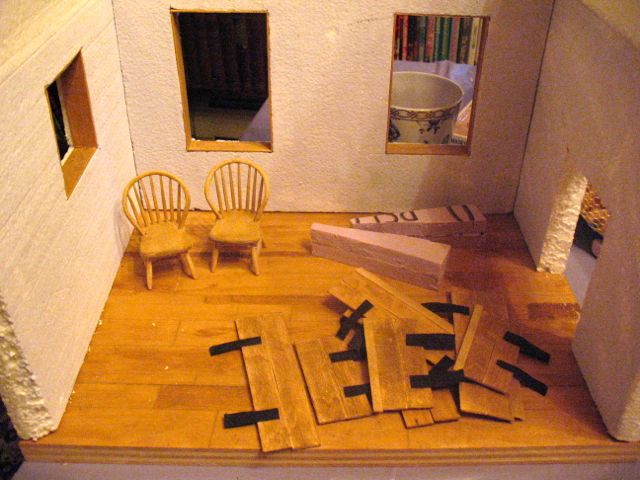
The interior of Mary-Anne's Tuscan wine and tea shop, where there has apparently been some kind of rumpus!

The exterior of Gnorbert the Gnome's home by Myra -- best front door ever!
And Gnorbert's cosy room inside.  Love that window!

Trina's beautiful Garden Shop, which manages to combine elegance and whimsy.  Look at the bird feeders on the fence!
And the inside of the shop, in progress :)

Thank you to all the wonderful campers I met and to the great people who organized this event.  I think I'm a lifer now, and I know I'm an Idjit and I intend to return every year!  I returned home with renewed mini-ing zest, and can't wait to get started on the WAMH again.

Related Posts with Thumbnails